Showing posts with label Projects. Show all posts

Wednesday, March 19, 2014

How To Turn An Ugly, Generic Kitchen Table Into A Farmhouse Table: Part 1

This project was a beast, but in the long-run was waaay worth it. I am very happy with the way it turned out, so I thought I would share my process of how it all went down. 

I really should title this post "The Wrong Way of How to Turn Your Ugly Kitchen Table into a Farmhouse Table", because believe me, there were several "oops" and "shouldn't have done that"s  along the way, but I figure that every mistake made is a learning experience, which is valuable info for the future. But definitely tucked into the category of "what not to do." ;) I'll explain as I go.

Here's what I started with:


A super high-glossy, honey-colored-topped, white-legged generic kitchen table that I bought off of Craigslist. Totally not me in terms of the color and finish, but it had several things going for it: it was solid wood, super sturdy, and it had a great shape.


At first I thought about keeping the legs white and only refinishing the top, but I knew that wasn't totally me, so I set to work (over about the course of a month- weather and kids permitting) to refinish the entire thing, legs and all. I'm very glad I did. Gotta trust your instincts!

The first thing to be done was strip the piece. This part may sound grueling, but something that got me pretty excited about this part was the products I was using. I watched a lot of video tutorials online and read about several "natural" and low-fume products that made this step seem less intimidating and overall more enjoyable. In the past when I have tried refinishing furniture, this step has been such a stinky, high-fume, messy, ooey-gooey step that I have literally just given up and not looked back. And to be honest, I didn't really have the right materials or the adequate knowledge. This time, I didn't just "wing it" like I usually do, but was more careful and thought-out and bought the right materials and not just the cheapest ones. What a difference it makes! I can honestly say I enjoyed the entire process. :)

So what products did I use?


Strypeeze. This product is awesome. I first heard about it from Miss Mustard Seed, and because she literally is the furniture refinishing queen, I had to try it. I searched for it at all your typical large home improvement stores, but couldn't find it so I ended up buying it online (I can't exactly remember where, but I know it was around $18). It was really easy to use and is low-fume and biodegradable, which is awesome because I get sick/headaches from stinky, chemical-smelling products. This never gave me issues (I wore a nose/mouth mask just for good measure though). Another product I have used in the past is Citristrip and this can be found at Home Depot, Walmart, etc. It is also low-fume and biodegradable, but is a little thicker and slightly harder to use than the Strypeeze if my memory serves me correctly. I liked using the Strypeeze better, but for a local option (at least here in the DFW metroplex), its a good choice and one I will likely use again in the future as well.


Another product I really loved (also used by MMS) was mineral spirits. I found this at my local Home Depot. It was around $11 for a large container. I will always use this from now on because it really helps to loosen any existing paint/varnish left (after you strip) and cleans the wood and any tools you use too. It says "odorless" which isn't exactly true, but it was definitely low-odor and is biodegradable like the strippers. 

Other tools I used in the stripping process were good quality gloves, dust mask, glasses, medium-grit steel wool (more on that later), several old cloths that I didn't mind discarding later, inexpensive chip brushes, and a 3-inch (approx.) stainless steel/rubber-handled putty knife/scraper. I have used plastic ones in the past and believe me, the difference is HUGE! It was worth the $5 investment. ;)

So first things first. I started with the table top and, using a chip brush, layered on a pretty good coating to the top. After about 30 minutes, the varnish started bubbling up and it looked like this:

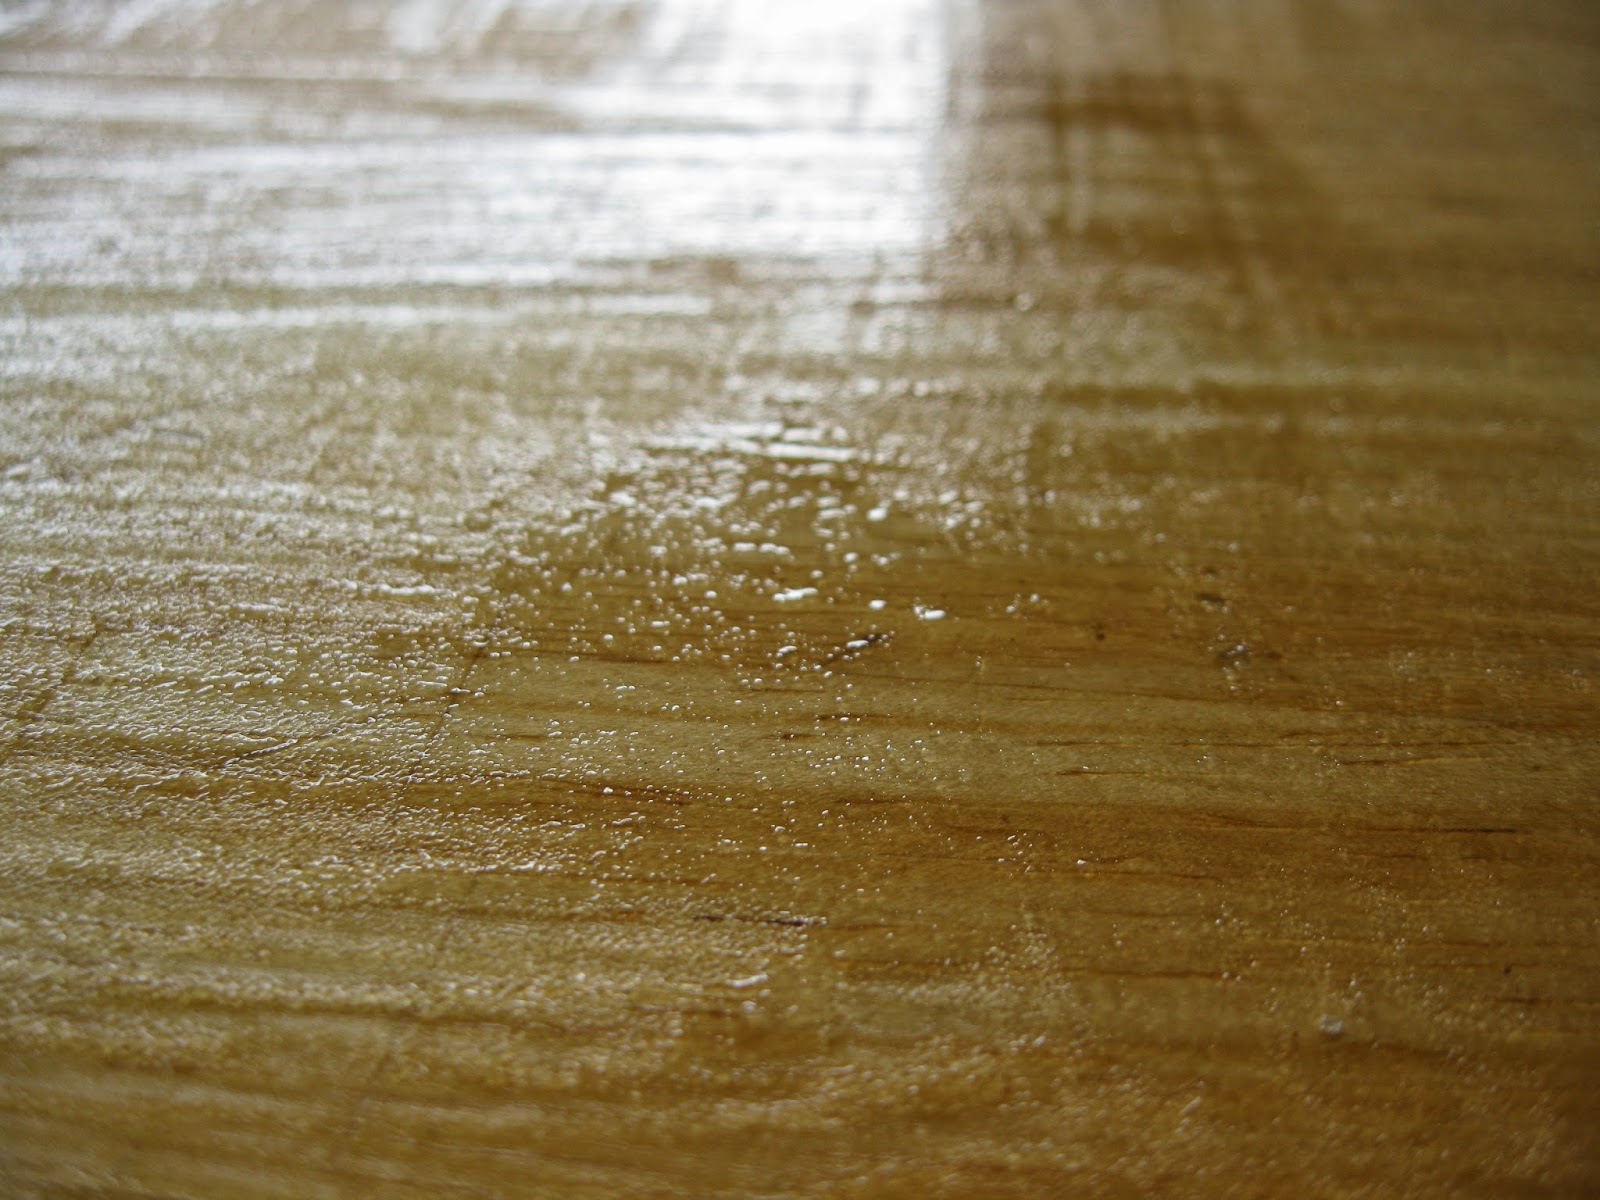


Using my putty knife, I started scraping off the finish off in long, strokes, going with the grain. 


When I had scrapped off all of what had come loose, the top looked like this:


Not a drastic improvement, but a little better. At this point I thought I had gotten all the honey-colored stain/varnish off and that the wood must actually just be yellow-ish, so I tried an experiment (bad idea). After I sanded the top down a bit (first with 100 grit sandpaper, then with 120) I went ahead and stained the top of the table so I could then work on stripping the legs while it dried. Warning: don't do this! What I didn't know was that the old varnish wasn't actually all off and the new stain wouldn't look even when I brushed it on. If I had waited until I stripped the entire piece first, I would have seen the true color of the wood I was working with underneath the paint on the legs. Oh well- lesson learned!


So here it is after my "experiment"/impatient step. It looks kinda pretty, but wait. 


The stain started looking really uneven (notice the variation in the photo above, although that is slighly sanded down) and some of it just looked like it was "sitting" on top and not soaking in. So what did I do? Applied a second coat. :( Same results. Some dark spots, some light, and overall just looked really streaky that I knew I wouldn't be happy with it in the end. 


Meanwhile, I was stripping the legs. Here's the process I went through (which I would recommend ;) ). 


Same as the top, I started by applying a thick-ish coat of the Strypeeze, waited 30 minutes, and scraped it off into an old, oatmeal container from the recycling bin (a large soup can would be ideal). 


See how the paint is "wrinkling" and pulling away from the wood! Yay- it's working! After applying several coats of the stripper and scraping as much off as I could with the putty knife, I cleaned the entire piece with the mineral spirits and an old cloth. After that there was still some stubborn paint on, so I used steel wool to really get into the grain of the wood by dipping it into mineral spirits, and scrubbing it on in the direction of the grain. This took a long time because there were some spots where the paint was really stuck on. After that step the paint that was still stuck on got sanded off. I waited til the last to do this because I didn't want to be sanding for forever or worst- sand away the shape of my legs! I used medium grit sandpaper to start off with, then finished off with a fine sandpaper so it would be smooth.


Lastly for the legs, I wiped down/cleaned the piece again with the mineral spirits and an old rag and if there were any paint still left on, I got an old toothbrush and dipped it in the mineral spirits, then scrubbed the paint off. This may sound OCD, but I knew that since I was staining the piece, there couldn't be any traces of the paint left or the stain wouldn't soak in or look even. 

At this point I had pretty much decided I wasn't happy with the top (and now I knew what color of wood I was working with) so I gave the top a good sanding with my power sander. Yay- much more even and no more yellow!! (note: don't ever use power sanders on legs/curvy accents, you will turn once rounded legs into blocks of wood in seconds (I learned that the hard way on a coffee table once! ) :(


All stripped down, sanded, and ready to be stained!


For the stain I used Minwax Wood Finish in "Special Walnut 224". It's a beautiful color- not too dark, not too light. This was about $10, give or take, from Home Depot. 


The staining process was fairly easy. Brush it on with a chip brush, wait about 5-15 minutes, then wipe off any excess with a clean, old cloth. I applied 2 coats and was happy with the darkness of the color.


This is what it looked like freshly stained, so it's still glossy. After the stain soaks in and dries a bit, the finish looks a lot more muted/dull. I didn't want a super glossy finish anyway.

In "Part 2" I'll show you what product I used to wax it with (another wonderfully natural product) and the finished result! :) But for now, so far so good! 

xo,
Gail

P.S. Have you worked on any projects lately? Had any learning curves along the way? Please share! :)

Wednesday, March 12, 2014

De-Cluttering Plan

Hello- I'm back! :) The end of February and beginning of March was a pretty routine couple of weeks, so nothing too exciting to blog about. However...I'm working on some fun projects right now that I'll be sharing with you in the next few weeks, so be looking for that if you're interested! It's been invigorating getting my creative on and jumping into some new things- how I've missed it! 

Also, another one of my recent pursuits has been to aggressively work on #10 of my "Leaps":

10. Get rid of everything in our house that we do not #1- love and #2- use. Basically, be rid of excess.

It's been really freeing to get rid of things we don't really need, use or love. I'm finding I have a whole lot more space than I realized and I've barely started! 

Over the next weeks until May 1st (my deadline because we're having a garage sale then) I'll be trying to tackle one area of clutter in our house/garage a day. Here are the areas of need that I've identified:

1) Master bathroom cabinets, drawers, and containers
2) Jewelry storage
3) Matthew's & my personal toiletries drawers
4) Matthew's closet
5) My closet
6) Shelves in Master Bedroom
7) Nightstands and dressers in Master Bedroom
8) Kitchen drawers & cabinets
9) Under the sink
10) Refrigerator
11) Book shelf in Living Room
12) Living Room armoire
13) Office desk drawer
14) Office desk top
15) Office storage
16) Other areas of office
17) Dining Room 
18) Hall bathroom- cabinets and drawers
19) Craft supply storage
20) Decorating supplies storage
21) Paint/supplies storage
22) Wrapping paper/bags storage
23) Desk in Caleb's room
24) Toys storage
25) Blanket shelves
26) Boys' stored clothing
27) Cole's closet
28) Boys' rooms
29) Photo album shelf
30) Saved magazines storage
31) Sewing supplies/fabric storage
32) Wall art
33) Garage tools storage
34) Garage sports balls storage
35) Cars (clean out)
36) Nails, screws, etc. storage
37) Garage overall
38) Outdoor patios- pots, toys, etc.
39) Email inbox
40) Pinterest boards

I actually started the process of de-cluttering back in January and have cleaned out some of these areas already, but would still like to go over them quickly again just to make sure. BUT, a lot of these specific areas I have yet to tackle too- so that'll be fun. Yes, I know---kinda strange, but I actually really enjoy getting rid of stuff and organizing. ;) 

My goal through all this de-junkifying and organizing is to truly be free of all the extra STUFF that is simply just getting in the way of us living and enjoying our lives freely. After all, if you own something, it in a way owns a little part of you too (mostly your time) and there are far more fun and rewarding things I'd like to do with my time than always be taking care of/being bothered by stuff...cause at the end of the day that's all it really is....just stuff!

So here's to getting this de-cluttering party started!!!


xo,
Gail

P.S. Perhaps you are organizing or de-cluttering too? If not, did this post motivate you to? Do you feel like your stuff sometimes gets in the way of other things you'd like to do with your time? Do tell- would love to hear! :) 

Tuesday, February 11, 2014

Owl Be Your Valentine {Tutorial}


Cole and I did some more Valentine's crafting yesterday and today, so I thought I would share with you how we made these little owl Valentine's using toilet paper tubes. Aren't they cute?! I've actually been saving up our T.P. tubes for the purpose of crafting with them, so this seemed like the perfect opportunity. And the best part- I had all the other materials on hand too (minus the treats)- score!

My sweet little helper. Here he is making Valentine cards for his cousins. :)


And here's Caleb giving me the evil eye for not including him (sorry baby) :(.


"Owl Be Your Valentine" Craft

Materials you'll need:
Toilet paper cardboard tubes (or paper towel tubes cut down)
Construction paper or other scrapbooking paper
Silly eyes
Tape
Glue stick
Scissors
Marker
Treats (to fill tubes)

First I cut out circles of construction paper with tabs to fit on the bottom of the tubes (so the treats wouldn't fall out when filled later).


And taped the tabs to the sides of the tube.


Afterwards I cut out my sheets of construction paper sized to the cardboard tubes, with a little extra for overhang.


And here it is glued securely to the tube.


Then the fun part- making it look like an owl! :) I cut beaks out of yellow construction paper first by cutting diamonds, then folding them in half.


And cutting out some teardrop-shaped owl "wings".


After that I cut some more construction paper for the bellies, wrote the message on them and glued them to the front. And lastly, I glued on the wings, eyes, beak, and folded down the top of the tube to create the "ears". 


I think they're pretty cute! Silly-looking, but cute. :) Next I'll fill them (from the top) with treats and fold the "ears" back down.


And here are my boys happily having a screaming contest during lunch.


Awww ...boys. :) 

xo,
Gail

Friday, February 7, 2014

Valentine's Craft

Seeing as how Valentine's Day is only a week away, I thought it would be fun to share a little V-Day craft that I did today during the boys' nap time. I'm not really big into hearts in decorating for the house, so when I saw this on Pinterest awhile back I thought it was really adorable and decided it fit within my decorating style. And, it's so simple you can practically do it with your eyes closed (okay, minus the scissors part! ;) But you get my point....it's eeeeasy. :) I like the way it turned out. Let me know if you try it too!


XO Clothesline Craft

Materials you'll need:
Graph paper (optional)
Pencil
Scissors
Sheet of cardboard (a leftover cereal box would do)
Craft paint (I used white and red and left some unpainted)
Craft paint brushes
Twine
Mini clothespins (crafts supply store)

 First I used my graph paper to draw out the X's and O's (you could do words too). I then traced them on my cardboard and cut them out. 


 After that it was just a matter of painting them and waiting til they had dried, which only took a few minutes


And here's how it looks in my kitchen. 


I think they're kind of sweet. :)


Happy Valentine's Crafting to you!

xo,
Gail

Thursday, February 23, 2012

In Bondage to "Stuff"?

"It was for freedom that Christ set us free; therefore keep standing firm and do not 
be subject again to a yoke of slavery." Galatians 5:1

A couple of weeks ago Matthew was rummaging through our pantry trying to find a particular food item, only to turn around, with a look of defeat on his face and say "our pantry looks like a hoarder's!" (major insult to this neat-freak). I retrieved the item he had been looking for, but knew right then and there something had to be done....immediately. Cause you know what? He was totally right. There was a huge mound of baking ingredients in one corner that looked more like a big trash pile than something you'd want to bake a cake with, there were boxes of cereal "attacking" anyone who dared to open up the pantry door, and besides just a general lack of organization, there were way too many multiples of things....things I didn't realize I even had! 


It only took me about an hour to wipe down every shelf and re-evaluate and reorganize the pantry...and what a relief it was! Here are a few things that helped me get back on track:


*I relocated my baking "mound" to a nice galvanized pail and put it in our revolving corner cabinet for easy access. This way it was out of the pantry (creating more space) and directly under the baking area of our kitchen. Now when I want to bake something I can just pull out the pail instead of sifting through a pile in the pantry. 


*If I had multiples of things, which I did (I actually had 6 bags of brown sugar, some opened, some not and 3 containers of corn syrup! All of which I rarely use anyway!) I consolidated bags/containers as best as possible.


*If it was past the expiration date...it was a goner!


*If I knew I probably wouldn't be using it again....it was a goner!


*If it looked "iffy"....it was a goner!


*Related items were organized in the same area (canning goods with other cans, pastas & rice together, etc).


*Frequently used items were the most accessible (though everything is still very accessible).


As I was in the process of purging and cleaning, I asked myself these two questions that seemed to speed up the process..."is it adding to my life, or is it taking away from my life?" And if the answer is the latter, then how is it taking away from my life?


*My time?


*Money?


*Relationships?


I know it may sound a little too deep for a simple endeavor such as organizing the pantry, but lately I've really been thinking......what is the purpose of "stuff?" Whether it be foodstuffs, clothing, furniture, toys, home decor, etc etc....what is God's intended purpose for it all? Here in America we are blessed with so much, but at the same time, I know (at least for me) it can sometimes get a little out of hand. If I am spending twice as much time trying to find something just because I have too much, then I am in bondage to my things. If I am constantly cleaning my things, fixing my things, polishing my things, and caring for my things and have no room leftover for relationships with people and with my Lord, then I am in bondage to my things. If I let my things define me (whether to have too much or too little or not the latest and greatest), I am in bondage to my things. If I am making excuses after excuses for reasons why I can't do important things in life (like relationships!) because of my things, then I am in bondage to my things. If I am too protective of my things and am unwilling to let them be used in appropriate ways to bless others, then I am in bondage to my things. The list goes on. 


There is a time and place for everything.....and if there isn't...then something has to go.  For me, I want the things I do own to "add" to my life, and not take away from it. If we live in a small house for the rest of our lives, I want to be okay with that and "live within our means" and use our things to bless others. And should we live in a big house some day, I don't want that to be an excuse to just accumulate....accumulate. 


The answer to these questions will look differently for everyone....there are a million personalities out there and God want to use us all in  different ways. I am certainly not saying just because you've been blessed with much means you have to go and throw it all away. Only you know your limits. And I'm not saying all I have it all figured out either (quite the contrary....you should see our garage!). But if you were to ask yourself these questions too, how would you answer them? Are you in bondage to your stuff? If anything it's certainly good food for thought...I know has been for me! 


xo,
Gail

Friday, December 9, 2011

Decorating for Christmas

Have you finished all your decorating for Christmas? I finished up last week (a week long process).....and am now totally in the Christmas spirit! Matthew and I have been listening to the Christmas station all day every day, I baked up Christmas cookies for a party, and I'm pretty sure there's several empty containers of eggnog in our recycling bin. (We LOVE that stuff!...with a little sprinkle of nutmeg, please. :)


Okay now....ready for picture overload??? Brace yourself. 


I was excited to decorate our mantel this year because of our newly updated make-shift mantel. I'll just go ahead and say it...I hated the way it used to look with the ugly grapevine fireplace screen that was oh-so-NOT my style. Now I love it! 


I made this stocking for Matthew the first year we got married. I made it using a pair of satin pants found at a thrift store, added some fur trim, and the tree was created using decorative pillow fringe in progressive lengths, a few red buttons for ornaments, strings of beads, a gold star button, and embroidery floss to stitch a "trunk" and his name. It was a labor of love...and the best part is...I was able to use a pocket from the pair of pants to create a "secret stash" pocket! In years past I've put a small bottle of wine in it or a chocolate bar. YUM! Go here to see. 


I made this sweet little stocking last year for Cole's first Christmas. I'm in the middle of making him a larger stocking made from the same sweater material, but until I finish it (which very well may not be until next year!) this one will stand in its place. I plan to update it though...I think a little wooden "C" hanging from the loop would be cute, or maybe some jingle bells?


And here is my stocking lovingly cross-stitched by my Momma and was mine all growing up. Some day I may make another one but for now, I love the little angels, the soft colors, and the memories that ensue. 


For the mantel I kept it simple with fresh greens and pinecones. The candlesticks I bought at hobby lobby several years ago and love the vintage look of them. 


Sweet vintage looking Santa. 


Simple "NOEL" letters craft using wooden letters, craft glue and silver glitter. Love!


The stonework above the mantel needed a little something, so I fashioned this wreath using fresh greens that I snatched up when we purchased our tree. It's awesome that they let you have as many discards as you want. I think I must have taken almost the entire pile! The turquoise isn't a traditional Christmas color I know, but it matches our home so that's the color I use for Christmas. I looove this ribbon and use it everywhere!


Sleeping Santa ceramic figure on side table. So sweet! I found this at a resale shop for $2.00 and snatched it right up because my family has one that looks exactly like it and it was always such a fun decoration to bring out each year. (I'm so sentimental....this can get me into trouble sometimes though). 


And now for the tree! I love the smell of a real tree! In real life the tree seems to take up the whole room but looking at this picture it appears that the wall behind it is enormous and bare. And it looks like I need to get wrapping too! ;)


This year I used vintage Christmas postcards to accent our already growing stash, which is in mostly golds, browns, rosy pinks, silver and turquoise. 


Here's a look at a couple up close. I just love the old artwork and greetings! 


A new addition...love how sparkly and pretty he is. ;)


I made this little house ornament several years ago when I was inspired by the cardboard houses that were so popular in the 1940's and 50's. 


This turquoise ornament is one in a set of eight (some are larger and smooth) that I purchased at Restoration Hardware on sale several years ago and are among my favorites cause the color is perfect!


A look at the tree at night. Just love it!


My vintage sewing machine all outfitted for Christmas. The manger scene is Italian made by Fontanini and is one of my most treasured Christmas decorations. Each piece is hand painted and the figures are made out of a hard plastic material...which means they are kid friendly! Cole enjoyed "helping" me set it up. 


At night. I just love walking through the house when it's all dark and only the light of the manger scene is on. The bold letters of the chalkboard seem to pop out too and it's nothing short of beautiful.


The kitchen. Unfortunately our kitchen doesn't have any windows (thus the pictures aren't the greatest), but you'll get an idea of what I've done in here. 


I decked out the shelf with some of my pink "Johnson Bros." Christmas dishes, more greenery and pinecones, and some yummy treats in apothecary containers.


Ribbon candy! Makes me think of my Grandma Cole who always has this out in her home at Christmas :)


I love how this little dish mimics a snowflake. Sweet!


I think this tree was the only thing I bought this year. I love it's vintage look and how fluffy and shimmery it is. 


The dining room. I made the garland using fresh greenery, ribbon, and twinkle lights. I've never attempted to make a natural garland before this year and now that I have and know how easy it is...there's no going back. Not to mention the fake ones are expensive and this one was free! I really love the affect it gives and how it brings life to the entire room. 


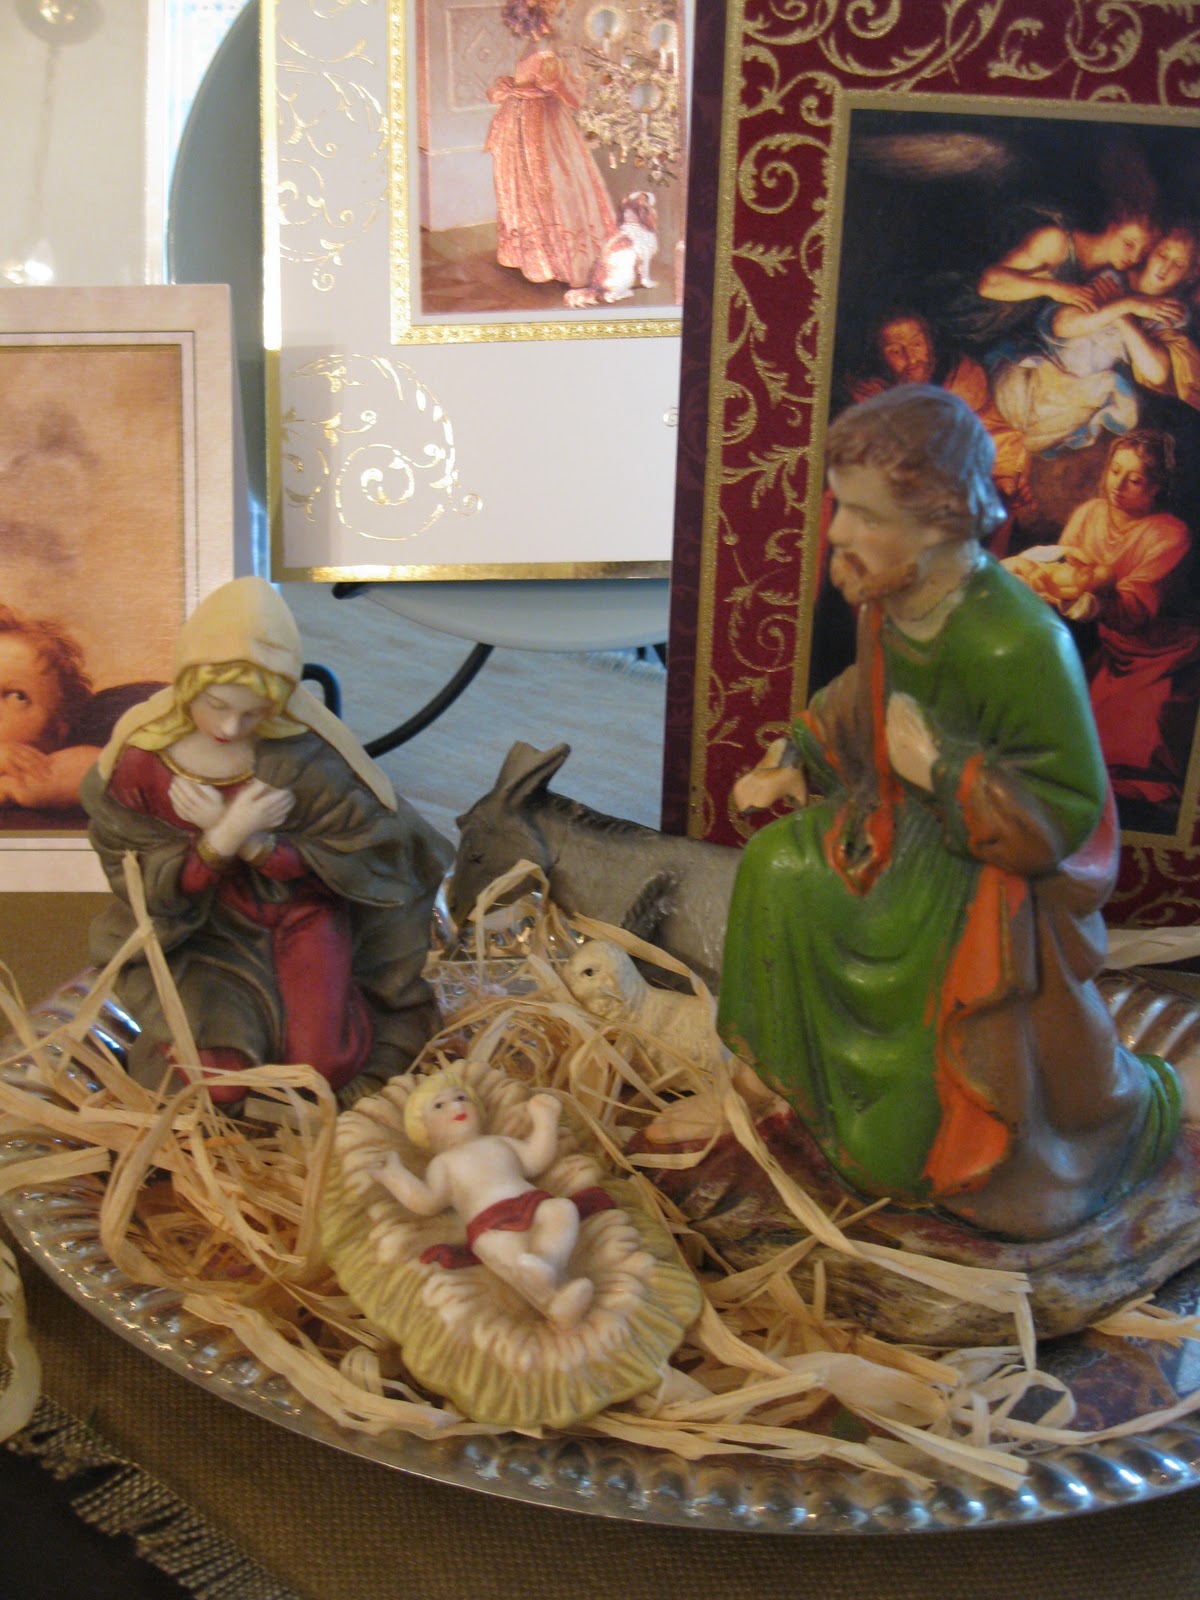
Another manger scene set inside a silver-plated dish.


The other side of the dining room...


And lastly, the dining room table. (forgive the poor photo lighting). I kept it simple with vintage sheet music for placemats, a runner of sorts of white crocheted doilies that look like snowflakes, and more of my Christmas dishes atop gold chargers. 


And that's all! If you got to the bottom of this post, thanks for taking the time to enjoy my Christmas decorations! And if you were inspired to deck your halls too, write me and tell me about it!


Merry Merry Christmas,

Gail