I really should title this post "The Wrong Way of How to Turn Your Ugly Kitchen Table into a Farmhouse Table", because believe me, there were several "oops" and "shouldn't have done that"s along the way, but I figure that every mistake made is a learning experience, which is valuable info for the future. But definitely tucked into the category of "what not to do." ;) I'll explain as I go.
Here's what I started with:

A super high-glossy, honey-colored-topped, white-legged generic kitchen table that I bought off of Craigslist. Totally not me in terms of the color and finish, but it had several things going for it: it was solid wood, super sturdy, and it had a great shape.

At first I thought about keeping the legs white and only refinishing the top, but I knew that wasn't totally me, so I set to work (over about the course of a month- weather and kids permitting) to refinish the entire thing, legs and all. I'm very glad I did. Gotta trust your instincts!
The first thing to be done was strip the piece. This part may sound grueling, but something that got me pretty excited about this part was the products I was using. I watched a lot of video tutorials online and read about several "natural" and low-fume products that made this step seem less intimidating and overall more enjoyable. In the past when I have tried refinishing furniture, this step has been such a stinky, high-fume, messy, ooey-gooey step that I have literally just given up and not looked back. And to be honest, I didn't really have the right materials or the adequate knowledge. This time, I didn't just "wing it" like I usually do, but was more careful and thought-out and bought the right materials and not just the cheapest ones. What a difference it makes! I can honestly say I enjoyed the entire process. :)
So what products did I use?

Strypeeze. This product is awesome. I first heard about it from Miss Mustard Seed, and because she literally is the furniture refinishing queen, I had to try it. I searched for it at all your typical large home improvement stores, but couldn't find it so I ended up buying it online (I can't exactly remember where, but I know it was around $18). It was really easy to use and is low-fume and biodegradable, which is awesome because I get sick/headaches from stinky, chemical-smelling products. This never gave me issues (I wore a nose/mouth mask just for good measure though). Another product I have used in the past is Citristrip and this can be found at Home Depot, Walmart, etc. It is also low-fume and biodegradable, but is a little thicker and slightly harder to use than the Strypeeze if my memory serves me correctly. I liked using the Strypeeze better, but for a local option (at least here in the DFW metroplex), its a good choice and one I will likely use again in the future as well.

Another product I really loved (also used by MMS) was mineral spirits. I found this at my local Home Depot. It was around $11 for a large container. I will always use this from now on because it really helps to loosen any existing paint/varnish left (after you strip) and cleans the wood and any tools you use too. It says "odorless" which isn't exactly true, but it was definitely low-odor and is biodegradable like the strippers.
Other tools I used in the stripping process were good quality gloves, dust mask, glasses, medium-grit steel wool (more on that later), several old cloths that I didn't mind discarding later, inexpensive chip brushes, and a 3-inch (approx.) stainless steel/rubber-handled putty knife/scraper. I have used plastic ones in the past and believe me, the difference is HUGE! It was worth the $5 investment. ;)
So first things first. I started with the table top and, using a chip brush, layered on a pretty good coating to the top. After about 30 minutes, the varnish started bubbling up and it looked like this:

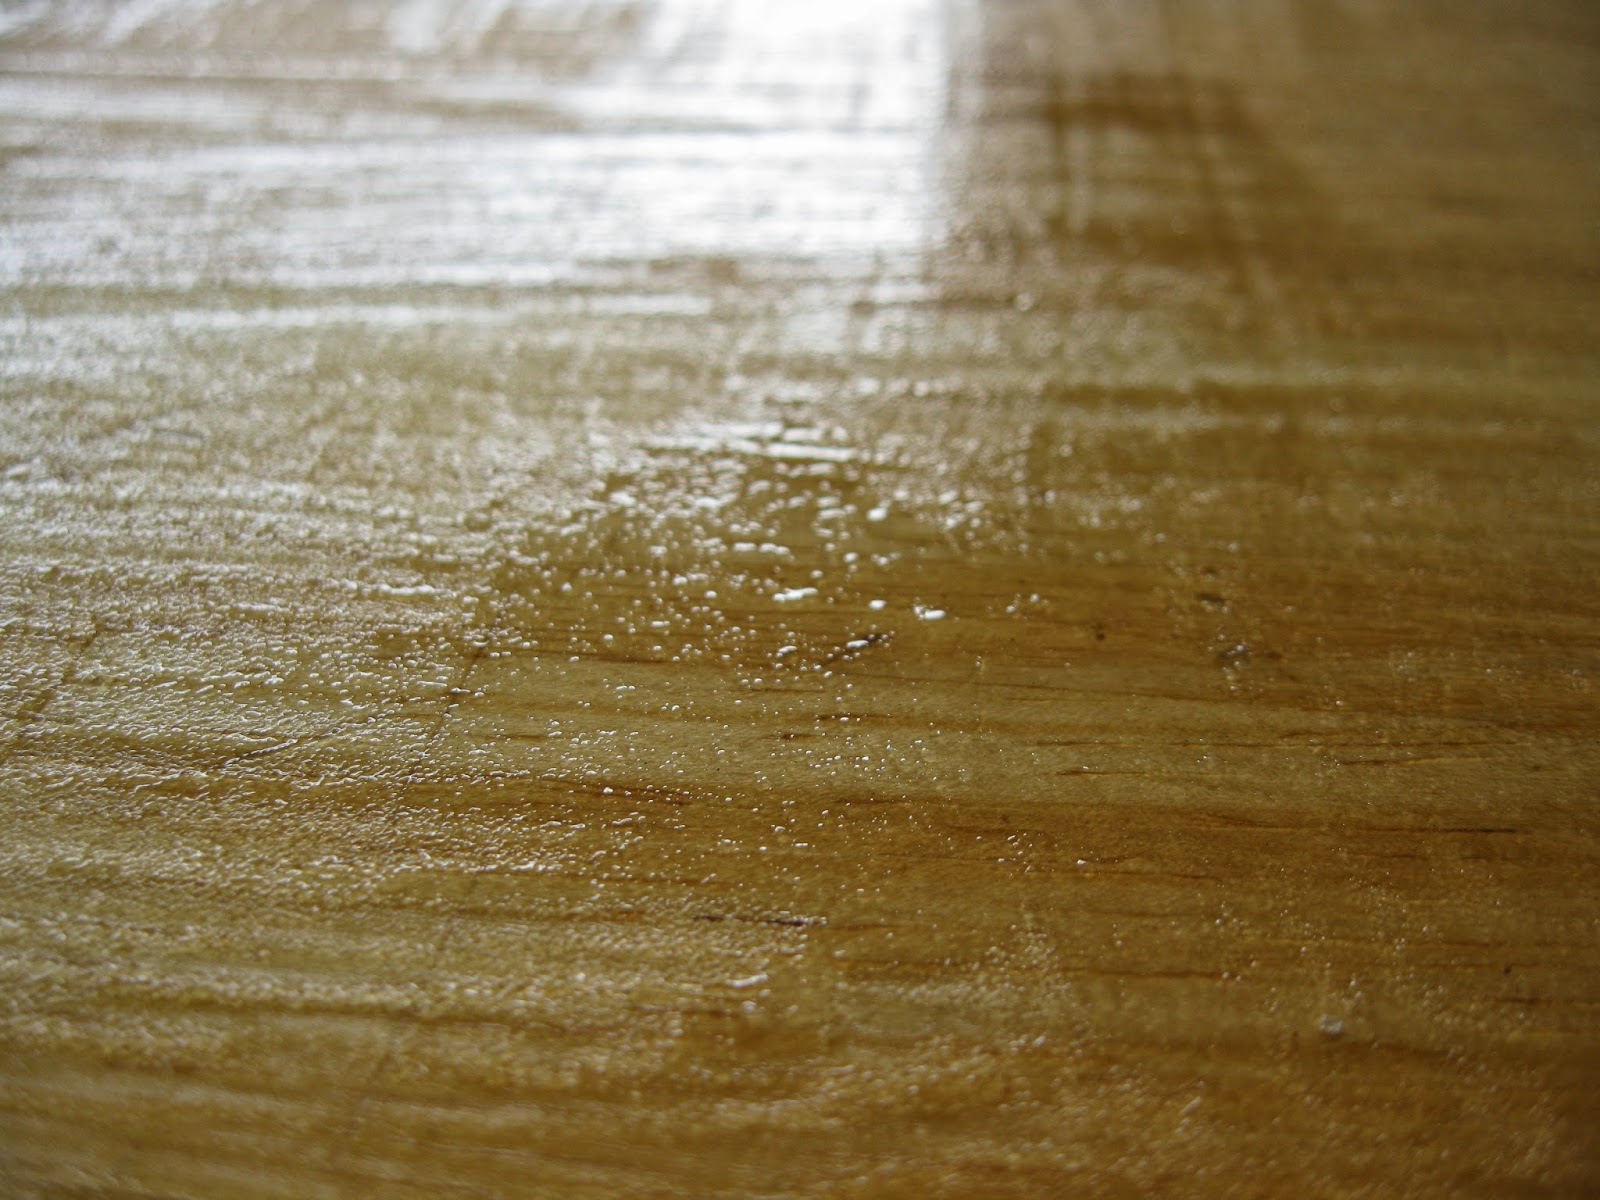
Using my putty knife, I started scraping off the finish off in long, strokes, going with the grain.

When I had scrapped off all of what had come loose, the top looked like this:

Not a drastic improvement, but a little better. At this point I thought I had gotten all the honey-colored stain/varnish off and that the wood must actually just be yellow-ish, so I tried an experiment (bad idea). After I sanded the top down a bit (first with 100 grit sandpaper, then with 120) I went ahead and stained the top of the table so I could then work on stripping the legs while it dried. Warning: don't do this! What I didn't know was that the old varnish wasn't actually all off and the new stain wouldn't look even when I brushed it on. If I had waited until I stripped the entire piece first, I would have seen the true color of the wood I was working with underneath the paint on the legs. Oh well- lesson learned!

So here it is after my "experiment"/impatient step. It looks kinda pretty, but wait.

The stain started looking really uneven (notice the variation in the photo above, although that is slighly sanded down) and some of it just looked like it was "sitting" on top and not soaking in. So what did I do? Applied a second coat. :( Same results. Some dark spots, some light, and overall just looked really streaky that I knew I wouldn't be happy with it in the end.

Meanwhile, I was stripping the legs. Here's the process I went through (which I would recommend ;) ).

Same as the top, I started by applying a thick-ish coat of the Strypeeze, waited 30 minutes, and scraped it off into an old, oatmeal container from the recycling bin (a large soup can would be ideal).

See how the paint is "wrinkling" and pulling away from the wood! Yay- it's working! After applying several coats of the stripper and scraping as much off as I could with the putty knife, I cleaned the entire piece with the mineral spirits and an old cloth. After that there was still some stubborn paint on, so I used steel wool to really get into the grain of the wood by dipping it into mineral spirits, and scrubbing it on in the direction of the grain. This took a long time because there were some spots where the paint was really stuck on. After that step the paint that was still stuck on got sanded off. I waited til the last to do this because I didn't want to be sanding for forever or worst- sand away the shape of my legs! I used medium grit sandpaper to start off with, then finished off with a fine sandpaper so it would be smooth.

Lastly for the legs, I wiped down/cleaned the piece again with the mineral spirits and an old rag and if there were any paint still left on, I got an old toothbrush and dipped it in the mineral spirits, then scrubbed the paint off. This may sound OCD, but I knew that since I was staining the piece, there couldn't be any traces of the paint left or the stain wouldn't soak in or look even.
At this point I had pretty much decided I wasn't happy with the top (and now I knew what color of wood I was working with) so I gave the top a good sanding with my power sander. Yay- much more even and no more yellow!! (note: don't ever use power sanders on legs/curvy accents, you will turn once rounded legs into blocks of wood in seconds (I learned that the hard way on a coffee table once! ) :(

All stripped down, sanded, and ready to be stained!

For the stain I used Minwax Wood Finish in "Special Walnut 224". It's a beautiful color- not too dark, not too light. This was about $10, give or take, from Home Depot.

The staining process was fairly easy. Brush it on with a chip brush, wait about 5-15 minutes, then wipe off any excess with a clean, old cloth. I applied 2 coats and was happy with the darkness of the color.

This is what it looked like freshly stained, so it's still glossy. After the stain soaks in and dries a bit, the finish looks a lot more muted/dull. I didn't want a super glossy finish anyway.
In "Part 2" I'll show you what product I used to wax it with (another wonderfully natural product) and the finished result! :) But for now, so far so good!
xo,
Gail
P.S. Have you worked on any projects lately? Had any learning curves along the way? Please share! :)
5 comments:
Lovely! I need you and your awesome DIY skills over here pronto! Looking forward to Part 2 and seeing this table in person!
-Gwen
good job!!
Thanks so much for sharing! Lots of thanks for this post. I think it is a very good post. It helps us many away. So many many thanks for this article. read this article
Thanks for the article.
See more about recliner for backpain
https://joseshome.com/best-recliner-for-back-pain-in-2017.html
It's inspiring to see how you transformed your kitchen table with careful planning and attention to detail.
Post a Comment