Friday, December 9, 2011

Decorating for Christmas

Have you finished all your decorating for Christmas? I finished up last week (a week long process).....and am now totally in the Christmas spirit! Matthew and I have been listening to the Christmas station all day every day, I baked up Christmas cookies for a party, and I'm pretty sure there's several empty containers of eggnog in our recycling bin. (We LOVE that stuff!...with a little sprinkle of nutmeg, please. :)


Okay now....ready for picture overload??? Brace yourself. 


I was excited to decorate our mantel this year because of our newly updated make-shift mantel. I'll just go ahead and say it...I hated the way it used to look with the ugly grapevine fireplace screen that was oh-so-NOT my style. Now I love it! 


I made this stocking for Matthew the first year we got married. I made it using a pair of satin pants found at a thrift store, added some fur trim, and the tree was created using decorative pillow fringe in progressive lengths, a few red buttons for ornaments, strings of beads, a gold star button, and embroidery floss to stitch a "trunk" and his name. It was a labor of love...and the best part is...I was able to use a pocket from the pair of pants to create a "secret stash" pocket! In years past I've put a small bottle of wine in it or a chocolate bar. YUM! Go here to see. 


I made this sweet little stocking last year for Cole's first Christmas. I'm in the middle of making him a larger stocking made from the same sweater material, but until I finish it (which very well may not be until next year!) this one will stand in its place. I plan to update it though...I think a little wooden "C" hanging from the loop would be cute, or maybe some jingle bells?


And here is my stocking lovingly cross-stitched by my Momma and was mine all growing up. Some day I may make another one but for now, I love the little angels, the soft colors, and the memories that ensue. 


For the mantel I kept it simple with fresh greens and pinecones. The candlesticks I bought at hobby lobby several years ago and love the vintage look of them. 


Sweet vintage looking Santa. 


Simple "NOEL" letters craft using wooden letters, craft glue and silver glitter. Love!


The stonework above the mantel needed a little something, so I fashioned this wreath using fresh greens that I snatched up when we purchased our tree. It's awesome that they let you have as many discards as you want. I think I must have taken almost the entire pile! The turquoise isn't a traditional Christmas color I know, but it matches our home so that's the color I use for Christmas. I looove this ribbon and use it everywhere!


Sleeping Santa ceramic figure on side table. So sweet! I found this at a resale shop for $2.00 and snatched it right up because my family has one that looks exactly like it and it was always such a fun decoration to bring out each year. (I'm so sentimental....this can get me into trouble sometimes though). 


And now for the tree! I love the smell of a real tree! In real life the tree seems to take up the whole room but looking at this picture it appears that the wall behind it is enormous and bare. And it looks like I need to get wrapping too! ;)


This year I used vintage Christmas postcards to accent our already growing stash, which is in mostly golds, browns, rosy pinks, silver and turquoise. 


Here's a look at a couple up close. I just love the old artwork and greetings! 


A new addition...love how sparkly and pretty he is. ;)


I made this little house ornament several years ago when I was inspired by the cardboard houses that were so popular in the 1940's and 50's. 


This turquoise ornament is one in a set of eight (some are larger and smooth) that I purchased at Restoration Hardware on sale several years ago and are among my favorites cause the color is perfect!


A look at the tree at night. Just love it!


My vintage sewing machine all outfitted for Christmas. The manger scene is Italian made by Fontanini and is one of my most treasured Christmas decorations. Each piece is hand painted and the figures are made out of a hard plastic material...which means they are kid friendly! Cole enjoyed "helping" me set it up. 


At night. I just love walking through the house when it's all dark and only the light of the manger scene is on. The bold letters of the chalkboard seem to pop out too and it's nothing short of beautiful.


The kitchen. Unfortunately our kitchen doesn't have any windows (thus the pictures aren't the greatest), but you'll get an idea of what I've done in here. 


I decked out the shelf with some of my pink "Johnson Bros." Christmas dishes, more greenery and pinecones, and some yummy treats in apothecary containers.


Ribbon candy! Makes me think of my Grandma Cole who always has this out in her home at Christmas :)


I love how this little dish mimics a snowflake. Sweet!


I think this tree was the only thing I bought this year. I love it's vintage look and how fluffy and shimmery it is. 


The dining room. I made the garland using fresh greenery, ribbon, and twinkle lights. I've never attempted to make a natural garland before this year and now that I have and know how easy it is...there's no going back. Not to mention the fake ones are expensive and this one was free! I really love the affect it gives and how it brings life to the entire room. 


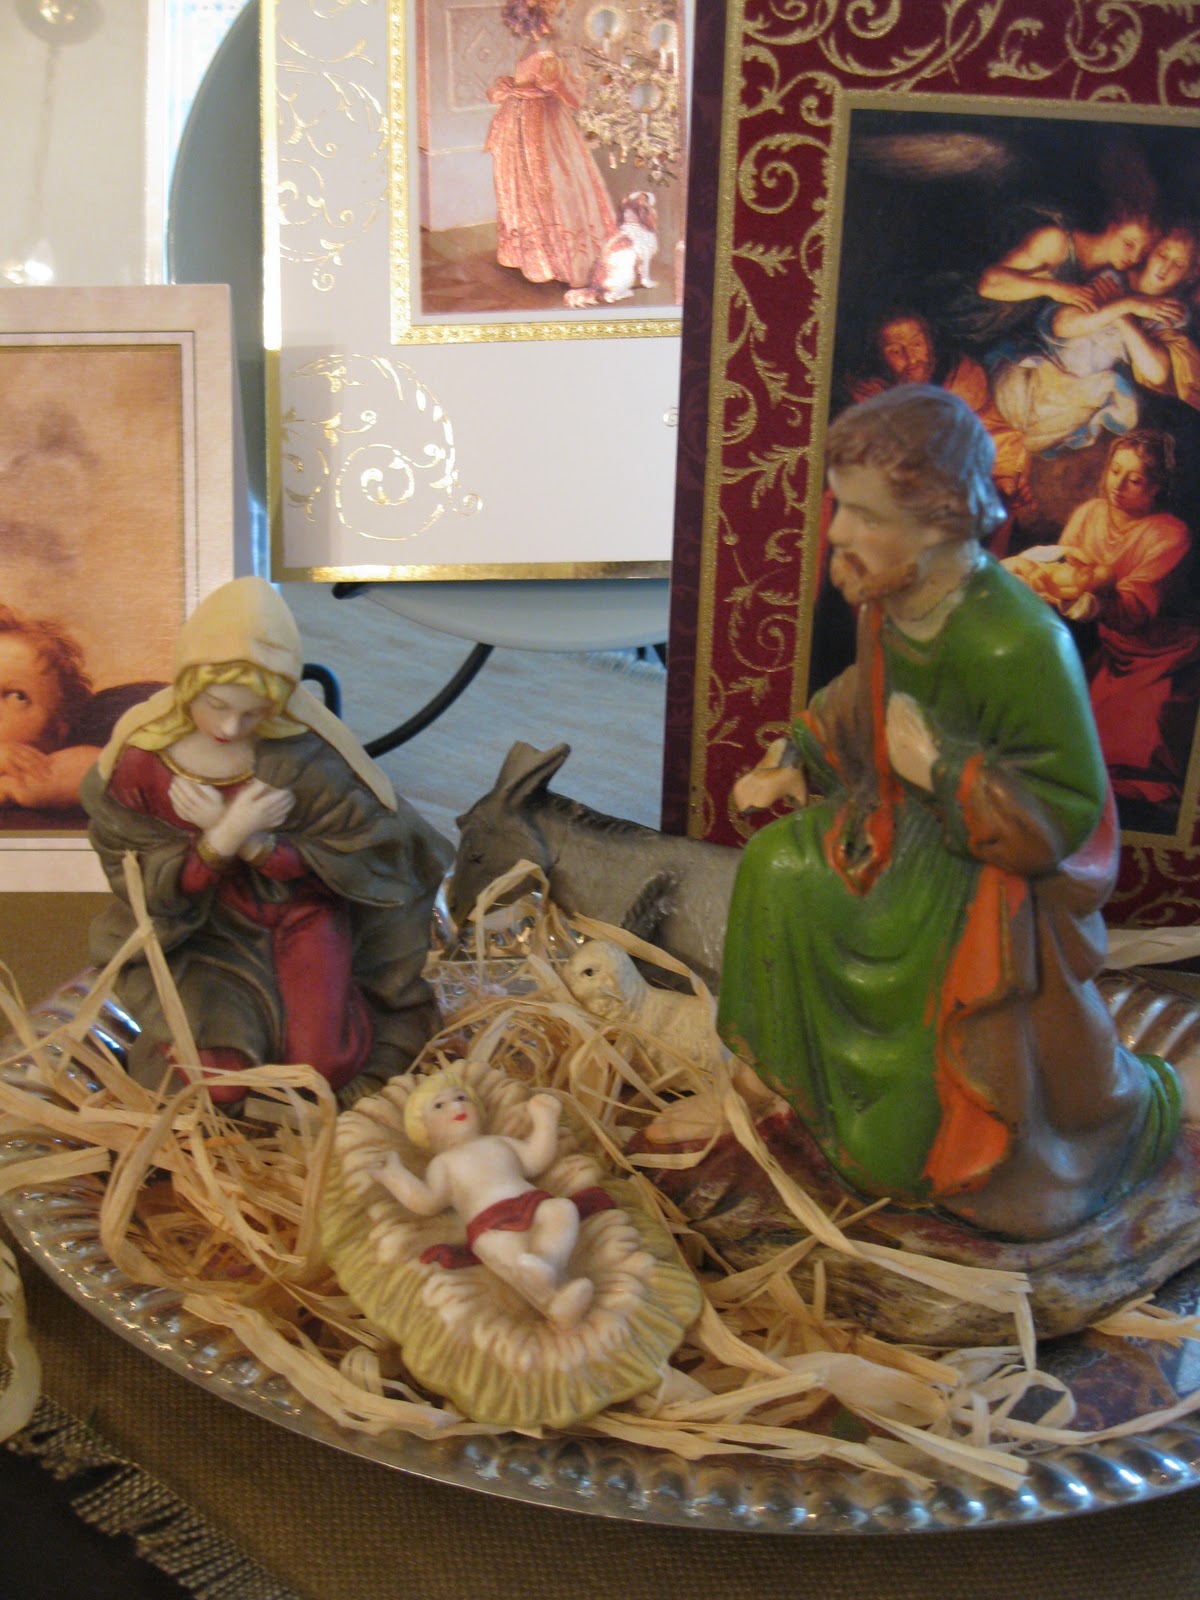
Another manger scene set inside a silver-plated dish.


The other side of the dining room...


And lastly, the dining room table. (forgive the poor photo lighting). I kept it simple with vintage sheet music for placemats, a runner of sorts of white crocheted doilies that look like snowflakes, and more of my Christmas dishes atop gold chargers. 


And that's all! If you got to the bottom of this post, thanks for taking the time to enjoy my Christmas decorations! And if you were inspired to deck your halls too, write me and tell me about it!


Merry Merry Christmas,

Gail

Monday, November 28, 2011

A Wonderful Weekend & a Thankful Tree

I hope everyone had a wonderful Thanksgiving weekend! We were very blessed to be able to spend the entire day enjoying our family, great food, the outdoors, and lots and lots of pie. :) I'd call that a day well spent! 


Thanksgiving family photo


"Sisters, sisters...there were never such devoted sisters"


The girls and our Momma :)


Trimming the tree on Saturday night


Me and my little Santa Baby


xo

~~~~~~~~~~~~

I made this "thankful tree" about a month and a half ago and meant to post pics of it right away, but life got really busy all of a sudden and that, along with some sloooow computer issues, and here I am and Thanksgiving's already come and gone. :( Oh well....I still want to write about it cause I just LOVED enjoying it all season. So here it is...late or not! :)


Dining room buffet


The branches I snagged from a neighbor's trash pile
and the moss (which is from Hobby Lobby) I already had
on hand. The pot I already had too so this project was free


A little bird ornament


Other things listed were: all of our families names, our sweet little
baby angels in heaven, good books, rain, "thumbs", etc!


Now onto the rest of our Christmas decorating!!! Yay!!!


Happy beginning of the Christmas Holidays!!!

Gail

Wednesday, November 16, 2011

Cole Walking & 1 Year Old

Today is Cole's 1st Birthday (*sniff sniff*). We started the day with several rounds of the "Happy Birthday" song, ate special applesauce birthday pancakes for breakfast (where he attempted to blow out his first candle), and watched him open a couple of gifts. So far it's been a great day! I don't think he really knows what's going on, but for us, it's a time to reflect on this past year with our sweet boy..and celebrate the most precious gift that God has blessed us with...


Cole Bryan. :)


It's hard to believe it's already been one year. It seems like just yesterday we were at the birthing center, anticipating his birth , then bringing him home where the realization finally started to settle in: we were parents. This was permanent. No going back. He was ours. 


It's been such a wonderful year, and though it's been hard at times figuring out this parenting stuff and how to balance our marriage, outside commitments and our sweet baby, it's been a whole lotta fun along the way. He brings more joy to our days than we ever thought possible...and looking back, it's hard to believe there was ever a time when he wasn't in our lives.


We love you sweet Cole! Happy Birthday Darling!


xoxo,
Momma


P.S. In other news, Cole is now starting to walk! Here's a little video I shot the other day for your viewing pleasure!


Friday, October 28, 2011

Simple Fall Mantel

I thought I'd keep it simple this year with the Fall decorating. I love love LOVE decorating, but sometimes I can be all over the place with it and it doesn't seem to make sense. I think this is in part due to the fact that I haven't really figured out "my style" yet. I like so many different styles!! :) Hey, maybe that's my style?!! 


This year I've been inspired by making things a little more simple, and decorating in such a way that allows individual pieces to really shine. Not too fussy...but not sparse either. Just balanced. :) Of course I still have areas of my home that need to reform to this model of thinking!...but I'm in process...and slowly I'm getting there. :) 


This is a make-shift mantel I created because the house we are renting didn't have a mantel. (Who would build a fireplace and not put a mantel on it?!).  I've been brainstorming for some time how I could make this work (over a year now) but because I was working with painted stone, it's not like I could just hang a shelf above the fireplace...that is, without drilling into the stone. We tossed that idea around but I really didn't want to bother with having to fill in the holes after we left and also, never having worked with stone before and it not being our place and all...it just wasn't going to be worth it. So....here you have it...our make-shift mantel. :)


I really like the way it turned out. I bought the screen at Hobby Lobby on sale and the mantel piece (which is sitting directly on top of the screen) is made from a rough piece of cedar (bought at Home Depot) that I sanded and stained a dark Minwax stain and sealed with a Minwax gloss. I used heavy duty Scotch velcro fasteners for extra security to fasten the screen to the stone and the mantel piece to the screen. It would have been fine without them cause it's not about to fall over or anything, but I wasn't going to chance it with Cole. :)  I know it probably seems a little tacky to use the fasteners, but thankfully, they are not even visible. Oh, and for those of you wondering about how to use the fireplace since it's now boxed in? Well folks, it's Texas. We only build a handful of fires each year anyway, at which point I'll just move the screen, turn on the gas, and put it all back. No sweat! :)


For the decor I used an old Fall landscape oil painting that I found at a garage sale awhile back, 2 little pumpkins from the Dollar Tree, some fall leaves I had on hand, and 2 cinnamon-colored candles (from HL) inside 2 of my glass candlesticks.


And this little beauty? This is Cole's my newest vintage love. It was a birthday gift and I do say, he sure is handsome sitting next to the fireplace! And if a "certain little someone" just happens to want to give those ol' rockers a whirl....I guess it'd be alright. :)


Happy Fall Decorating
and Have a Wonderful Weekend!!

Gail


Linking up to:
My Romantic Home
The Shabby Nest